In a nutshell
- 🧂 Salt acts as a micro-abrasive, lifting oils and light limescale without gouging; quick dissolution limits abrasion time and protects the steel’s passivation layer for fast, clean streak removal.
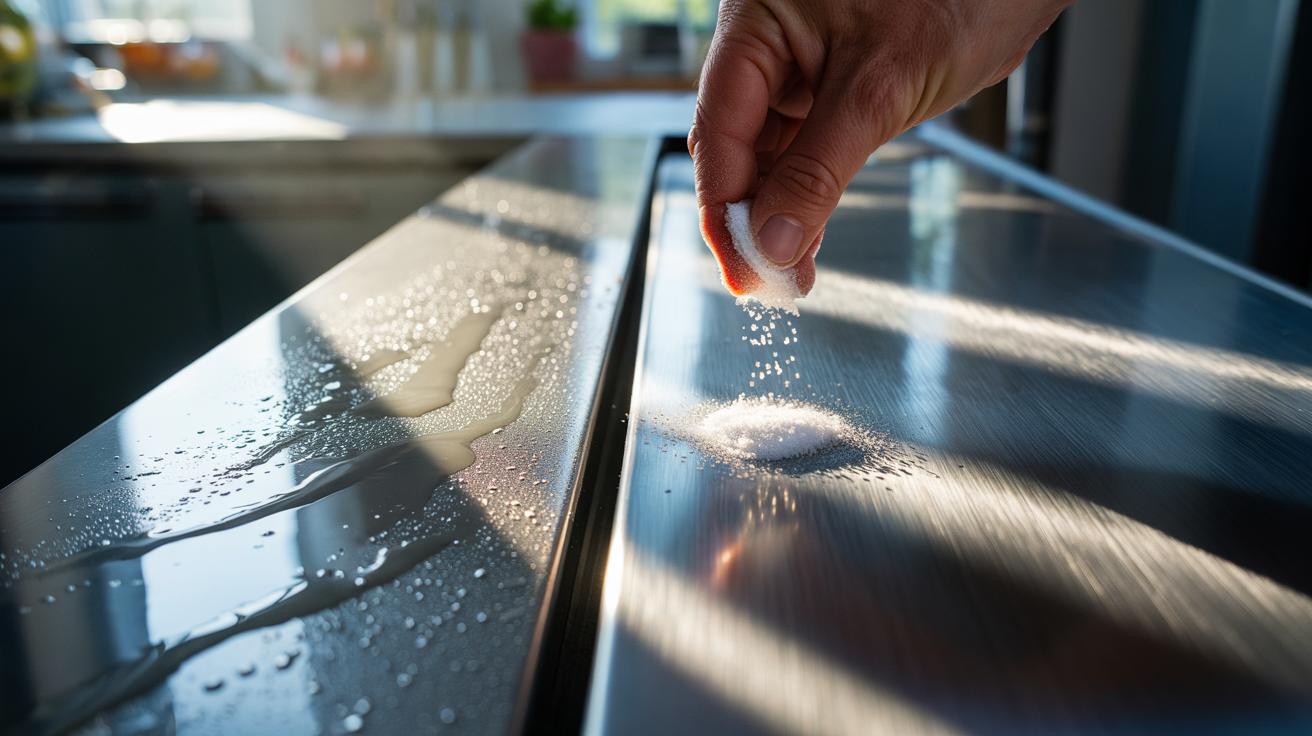
- ⏱️ The one-minute method: dust a pinch of salt, wipe with a damp cloth along the grain, then rinse and dry thoroughly; finish with a tiny dab of food‑safe oil to resist future fingerprints.
- ⚠️ Safety first: chlorides can cause pitting if left on the surface—keep contact under a minute, avoid mixing with bleach or acids, and test on anti-fingerprint coatings or mirror finishes.
- 🏠 Versatile uses: fridge doors, sinks, taps, hoods, and cutlery benefit; avoid seams, lacquered parts, and appliance interiors; for heavy limescale, use a remover first, then salt for the final polish.
- 💷 Practical and eco-lean: a budget-friendly alternative to specialist sprays with low scratch risk, supported by a simple comparison to baking soda and cream cleaners.
Fingerprints on the fridge, limescale halos on the sink, and that stubborn grey haze on cookware — the daily reality of stainless steel in British homes. Here’s the twist: a humble pot of table salt can cut through those marks fast, without pricey sprays or harsh scouring. Salt’s crystalline texture gives it a measured bite; its chemistry gives it focus. Used correctly, it lifts oils and mineral films while sparing the grain. In real-world kitchen tests, streaks vanish in under a minute, leaving a clean, convincing sheen. This is science you can try between boiling the kettle and plating supper.
Why Salt Works on Stainless Steel
Salt is a micro-abrasive. Its small, angular crystals sit in a sweet spot: hard enough to dislodge greasy fingerprints and light limescale, yet softer than steel, so it doesn’t gouge if you keep pressure gentle. Each grain behaves like a tiny scraper, lifting film rather than grinding the surface. Crucially, salt crystals dissolve quickly; this limits the abrasion window to seconds, not minutes, which is exactly what you want for streak removal. Short contact plus immediate rinsing means clean metal, not a scratched finish.
There’s also chemistry at play. Stainless steel’s famed resilience comes from a microscopically thin passivation layer of chromium oxide. Finger oils and tap-water minerals sit atop that layer, clinging just enough to show up as smears. Salt’s texture breaks the grip; a damp wipe carries the residue away. Because chloride ions can attack steel if left to linger, the rule is simple: quick application, thorough rinse, full dry. Done that way, you get the benefits of the abrasive without the drawbacks of corrosion.
| Abrasive | Relative Grit | Typical Use | Scratch Risk on Stainless |
|---|---|---|---|
| Table salt | Fine–medium | Streaks, prints, light watermarks | Low if used gently |
| Baking soda | Very fine | Tea stains, tarnish, mild scouring | Very low |
| Cream cleaner | Medium | Heavier limescale, sinks | Medium; test first |
The One-Minute Method: Step-by-Step
Clock starts now. 0–10 seconds: dry the surface with a clean microfibre cloth; streaks hide in moisture. 10–20 seconds: sprinkle a pinch of salt directly over the marks — a light dusting, not a snowdrift. 20–40 seconds: dampen the cloth, then wipe with firm, even strokes along the grain. Short, straight lines. For a stubborn patch, a few gentle circles help, but finish with the grain to keep the brushed look intact. Do not scrub aggressively — pressure, not force, does the work.
40–50 seconds: rinse with warm water or a fresh damp cloth until the salt has fully dissolved and lifted away. 50–60 seconds: buff dry with a second cloth, then add a fingertip of food-safe mineral oil or a drop of sunflower oil to a rag and glide it over the surface; this thin film resists future fingerprints. Tips: avoid edges with printed logos, skip heated zones until cool, and never let salt sit in crevices. You’ll see the matt haze clear, the gleam return, and no chemical tang in the air — just clean, quick results.
Safety, Risks, and When to Avoid
Stainless steel isn’t invincible. Chlorides — the “salt” part of sodium chloride — can cause pitting if left in contact, especially on grades like 304 common in UK kitchens. That’s why timing matters. Keep contact under a minute, rinse thoroughly, and dry completely. In coastal homes, where salt air already loads surfaces, be even more diligent about the rinse-and-dry stage. If your appliance has an anti-fingerprint coating or mirror-polished finish, test an inconspicuous corner first; some coatings prefer only a mild soap and water.
Don’t pair salt with bleach or strong acids; that cocktail accelerates corrosion. For specks of existing rust, a paste of baking soda and water, or a cleaner containing oxalic acid (used sparingly), is safer. Hot cookware? Let it cool — warm metal speeds reactions. If you’re caring for a brushed sink, you can rotate salt with very fine non-scratch pads, but keep strokes aligned with the grain. When in doubt, start milder, then step up. The result you want is refreshed metal, not a re-polish job.
Beyond the Sink: Versatile Home Uses
The salt trick isn’t just for fridge doors. It excels on kettle exteriors, extractor hoods, oven fascias, and stainless worktop trims where handprints build up. For cutlery, a salt-and-water swipe clears film before a final rinse, useful after dishwashers leave rainbow tints. On brushed taps, a pinch on a damp cloth removes toothpaste specks and hairspray overspray. Use less than you think you need; the crystals do the lifting.
There are limits. Avoid the inside of dishwashers and washing machines where salt could sit in seams. Skip salt on lacquered steel or painted trims. For heavy limescale on sinks in hard-water regions, start with a limescale remover, then deploy salt for the final de-haze. A weekly maintenance routine works: fast salt pass, rinse, dry, micro-oil. The payoff is visible. Surfaces stay cleaner for longer, and the kitchen looks editorial, not industrial. That’s frugal, fast, and quietly satisfying — the rare household hack that respects the metal beneath the shine.
Stainless steel rewards care that’s precise, not punishing. Salt offers that precision: a controllable abrasive that clears prints and light film in seconds, provided you rinse and dry promptly. It fits tight schedules and tighter budgets, and it cuts through the myths that only specialist sprays will do. Think of it as a micro-polish, not a scour. With the right touch, your hob, sink, and appliances regain the calm, even glow they had on delivery day. Where could a one-minute salt sweep sharpen your kitchen’s look this week, and what will you test first?
Did you like it?4.4/5 (28)